How to Use Sponges to Color Concrete
by Rick Lobdell
How to Color Concrete – In a recent article, “Gray Area,” I talked about the significance of knowing the initial color you’re staining on top of, which oftentimes is regular gray concrete. However, many contractors prefer to use an overlay on every project they do. If that’s the case, then it’s the color of the overlay which can be white, gray or any integral color.
In this article, I’m going to discuss a technique I’ve used since day one of my decorative concrete career. Whereas I’m not a fan of overlays unless they’re necessary, I continually compete against knockdown finish companies that prefer them. Most of my competition uses overlays on pool decks and patios no matter what. This gives me a unique spin to compete against them.
Most pool decks I work on are old and desperately need a fresh new look. There are always a few cracks and the tops of rocks are starting to appear from years of the surface enduring the effects of sun and rain.
On just about every pool deck, there are two important points my clients want addressed: The gray concrete is usually too bright, and they don’t want a refurbished surface that’s too hot to walk on. The “too hot to walk on” part is why so many companies use a knockdown finish.
Light colors are the one thing I have in common with my competition. Instead of using an overlay to help cool down the surface, I use light colors.
Whereas most of the knockdown finish installs I see are one solid color, I use two to three colors to add depth and character to the pool deck. When I’m done, it looks as if I used a knockdown finish but there’s no texture change. Instead, I start with a solid-colored sealer and add two more colors with sponge rollers.
Going for the layered look
Let’s break down this process and discuss how I layer colors. For the video that accompanies this piece, I made three sample boards to show how I sponge my projects. In Figure 1 here, there are three ground colors: the lightest is Bombay, the medium tone is Sandstone, and the darkest is Charred Walnut.
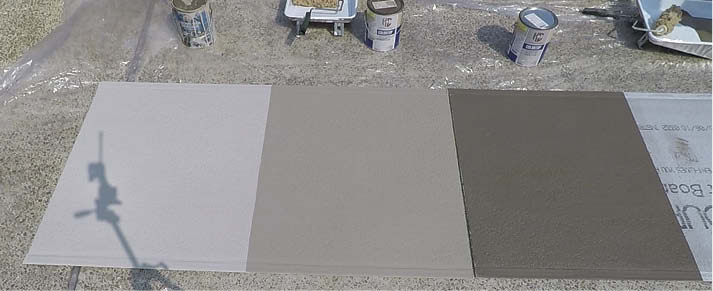
This is my go-to color combination for almost all my projects because it blends so well. Of course, there are exceptions, but Bombay and Sandstone match almost every trim color used. And Charred Walnut matches details in almost every brick house I’ve ever dealt with.
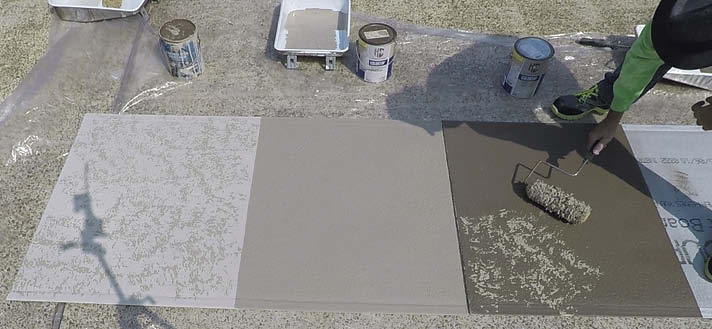
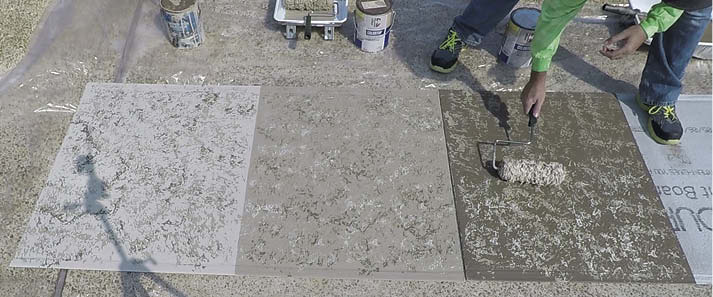
In Figure 2, I’m applying the medium tone color over the lightest and darkest base colors. I’ve already sponged over Bombay and you can see me applying Sandstone over Charred Walnut. I have very little color on the roller and I’m not pressing hard. You must be careful not to over-sponge. If you do, you’ll make sharp edge lines or might cover too much of the surface.
Just like any other seal coat, take care not to apply too much or too many layers.
Sleight of hand
In Figure 3, I’ve already applied Charred Walnut as the first color over Sandstone. I’m adding it as a third color over Bombay. Notice the depth it immediately creates.
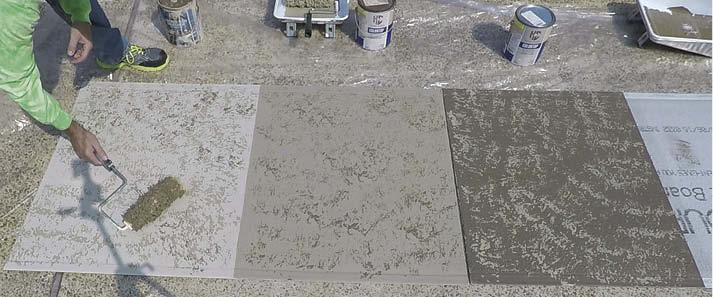
For best results, go lightly on the third color. Depending on which combination you choose, don’t use too much dark color or too much light color. In this example, there is barely any product on the roller and I’m ever so slightly touching the surface with it.
On a large-scale project, apply the first sponge color with a pole attached to the roller. Then draw and cut your design. Finish up by sponging each tile individually with the final color, carefully rolling each one by hand just like in Figure 3.
In Figure 4, I’m applying the final color, Bombay. I’ve already applied it to the Sandstone sample and am finishing the Charred Walnut. I love how the middle sample came out. Typically, that’s what I’m trying to achieve with this technique. I think there’s a little too much color on the Charred Walnut sample.
Typical for so many decorative concrete projects, no sponged surface will be the same as the last. Because each sponge roller creates a different mark, it’s hard to predict the outcome. Like anything else, practicing will help you understand how rollers mark during application.
Third time’s the charm
In Figure 5, the sponging is complete. It’s hard to believe these samples were all created with the exact same colors as none of them look the same. I find it amazing how important an initial base color is to the final product.
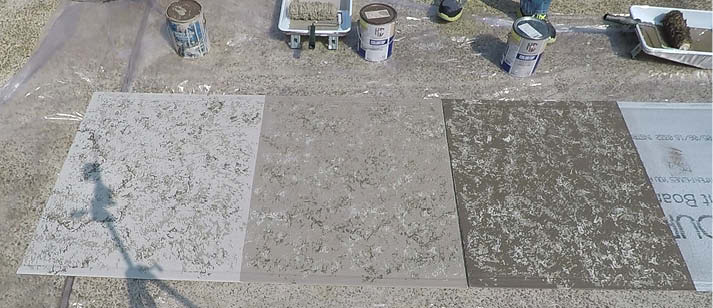
In most of my projects, I use Sandstone as the ground color. I don’t think it’s too dark and sometimes I think Bombay as a ground color is a little too light. I don’t do the darkest color on pool decks very often because it could still get a little hot to walk on.
It only takes three colors to create amazing depth with this process. I’ve done a lot of pools with only two colors and they look great. But adding that third color brings so much more depth to the space and the overall design.
Shock and awe
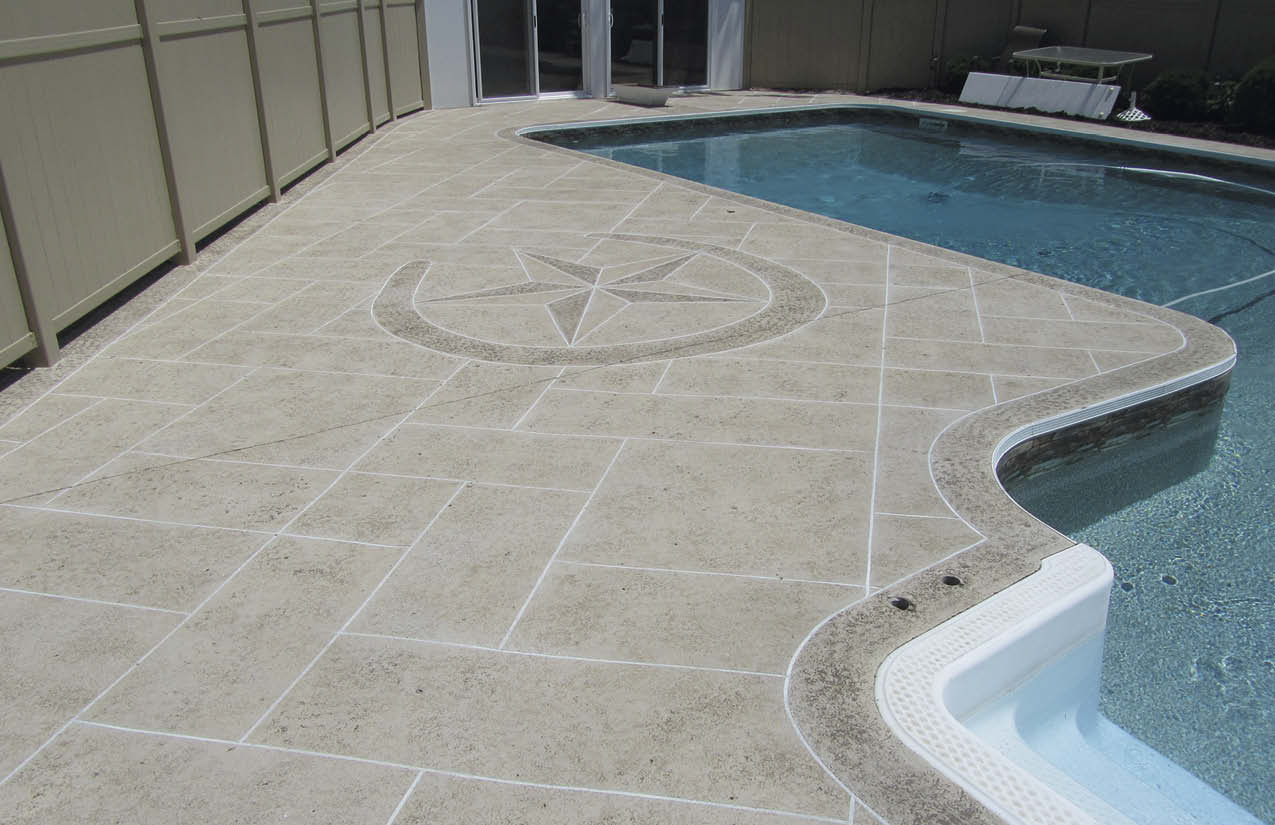
Now that we’ve covered color, let’s turn our attention to how design can add the finishing touch to this technique. In Figure 6, I used Sandstone as my ground color for this pool deck and applied Bombay as the second color. Then I did all my design work. Finally, I hand sponged each tile with Charred Walnut.
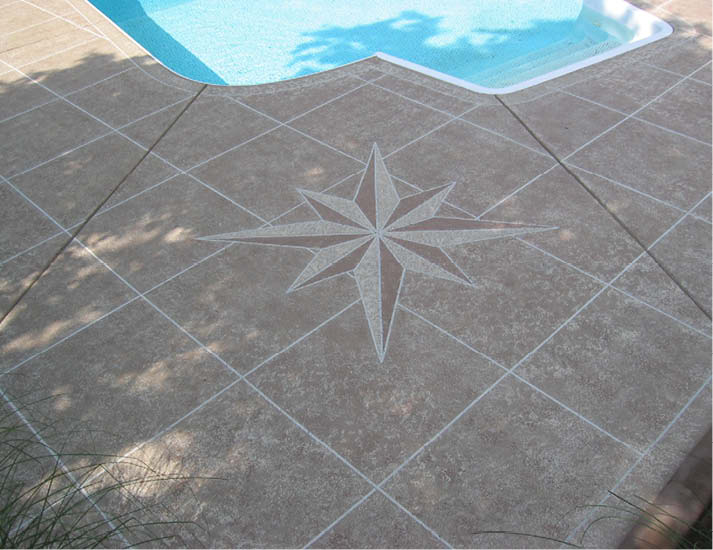
To detail the compass rose, I used a small piece of sponge. It might be hard to see in the photo, but I didn’t apply the darker color to the border. Sometimes I overly sponge the border, or just paint it a solid color like in Figure 7. It does not take a lot of design to finish off this technique.
A basic or ashlar pattern is perfect to break up all the sponging. Each tile will look different because of this technique. My clients are always shocked at the outcome (in a good way) and all their friends in awe because they think tile was installed instead of the existing pool deck simply refreshed.
Editor’s Note: To view a video on the process described in this article, go to https://bit.ly/2MPfgMC
Stone Technologies Corp. added that these type of effects can be achieved by either using our Colored Concrete Sealers or for a more flexible approach by using our Water Based Concrete Dyes to achieve the exact design that you require. These dyes are not substantive to the concrete until they are sealed so you can alter the design or remove any “errors” using warm soapy water prior to sealing. Once you have achieved your perfect design then spray (or roll if you want a more variegated pattern) two applications of our invisible, clear, non-slip Concrete Sealer X-3 two hours apart and then allow to cure for 24 hours without rain
The post How to Use Sponges to Color Concrete appeared first on Stone Technologies Corp. Blog.


